

Understanding Frame Wedding Photos: Types, Materials, and What They Mean
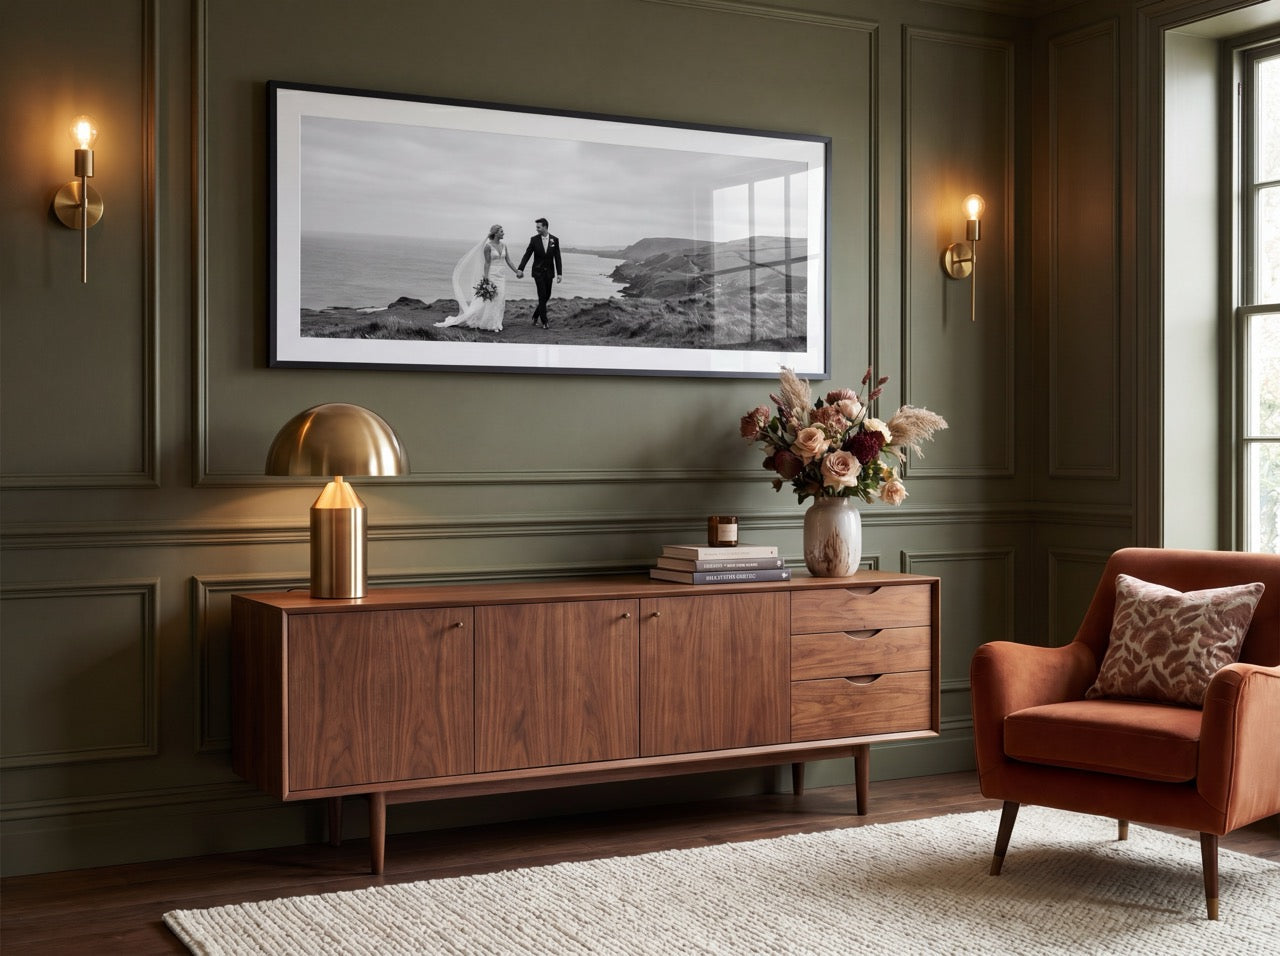
When couples decide to showcase their wedding memories, the choice of frame does more than just protect the image - it signals style, context, and longevity. Wedding photos framed in a thoughtfully selected material can turn a simple snapshot into a focal point, whether it hangs in a living‑room gallery or rests on a bedside console. This section breaks down the most common frame types, the materials that underpin them, and the visual messages each combination conveys.
Frame styles you’ll encounter
- Classic wood frames – Light oak, walnut, or reclaimed pine provide a warm, natural backdrop. Wood frames pair well with vintage‑inspired décor and can be finished in matte or glossy stains.
- Modern metal frames – Aluminium or brushed steel create a sleek, contemporary feel. The thin profile keeps the emphasis on the image, making them ideal for minimalist interiors.
- Acrylic and glass mounts – Clear acrylic panels give a floating effect, especially striking for panoramic or ultra‑panoramic prints. They also protect the artwork from UV exposure while maintaining a light, airy look.
Each style influences how the photo is perceived. A rustic wooden frame may suggest nostalgia, whereas a black framed hangtiles set can lend drama and contrast, highlighting bright wedding colours.
Materials and their practical implications
- Solid wood offers durability and a tactile quality that ages gracefully. However, it can be heavier, requiring sturdy hanging hardware.
- Engineered wood (MDF) is cost‑effective and smooth, but it is more susceptible to moisture damage if not sealed properly.
- Metal frames are lightweight and resistant to warping, but they can dent if mishandled.
- Acrylic is shatter‑resistant and lighter than glass, yet it may scratch more easily; a soft‑cloth cleaning cloth is recommended.
Choosing the right material balances aesthetic aims with the practicalities of the display location. For example, a hallway prone to temperature fluctuations benefits from a metal frame, while a bedroom sanctuary can accommodate the weight of a solid‑wood piece.
Types of prints that complement each frame
- Wedding canvas prints – Printed on stretched canvas, these work beautifully with wooden frames, echoing the texture of the medium. Canvas prints also hide minor imperfections, making them forgiving for large‑scale reproductions.
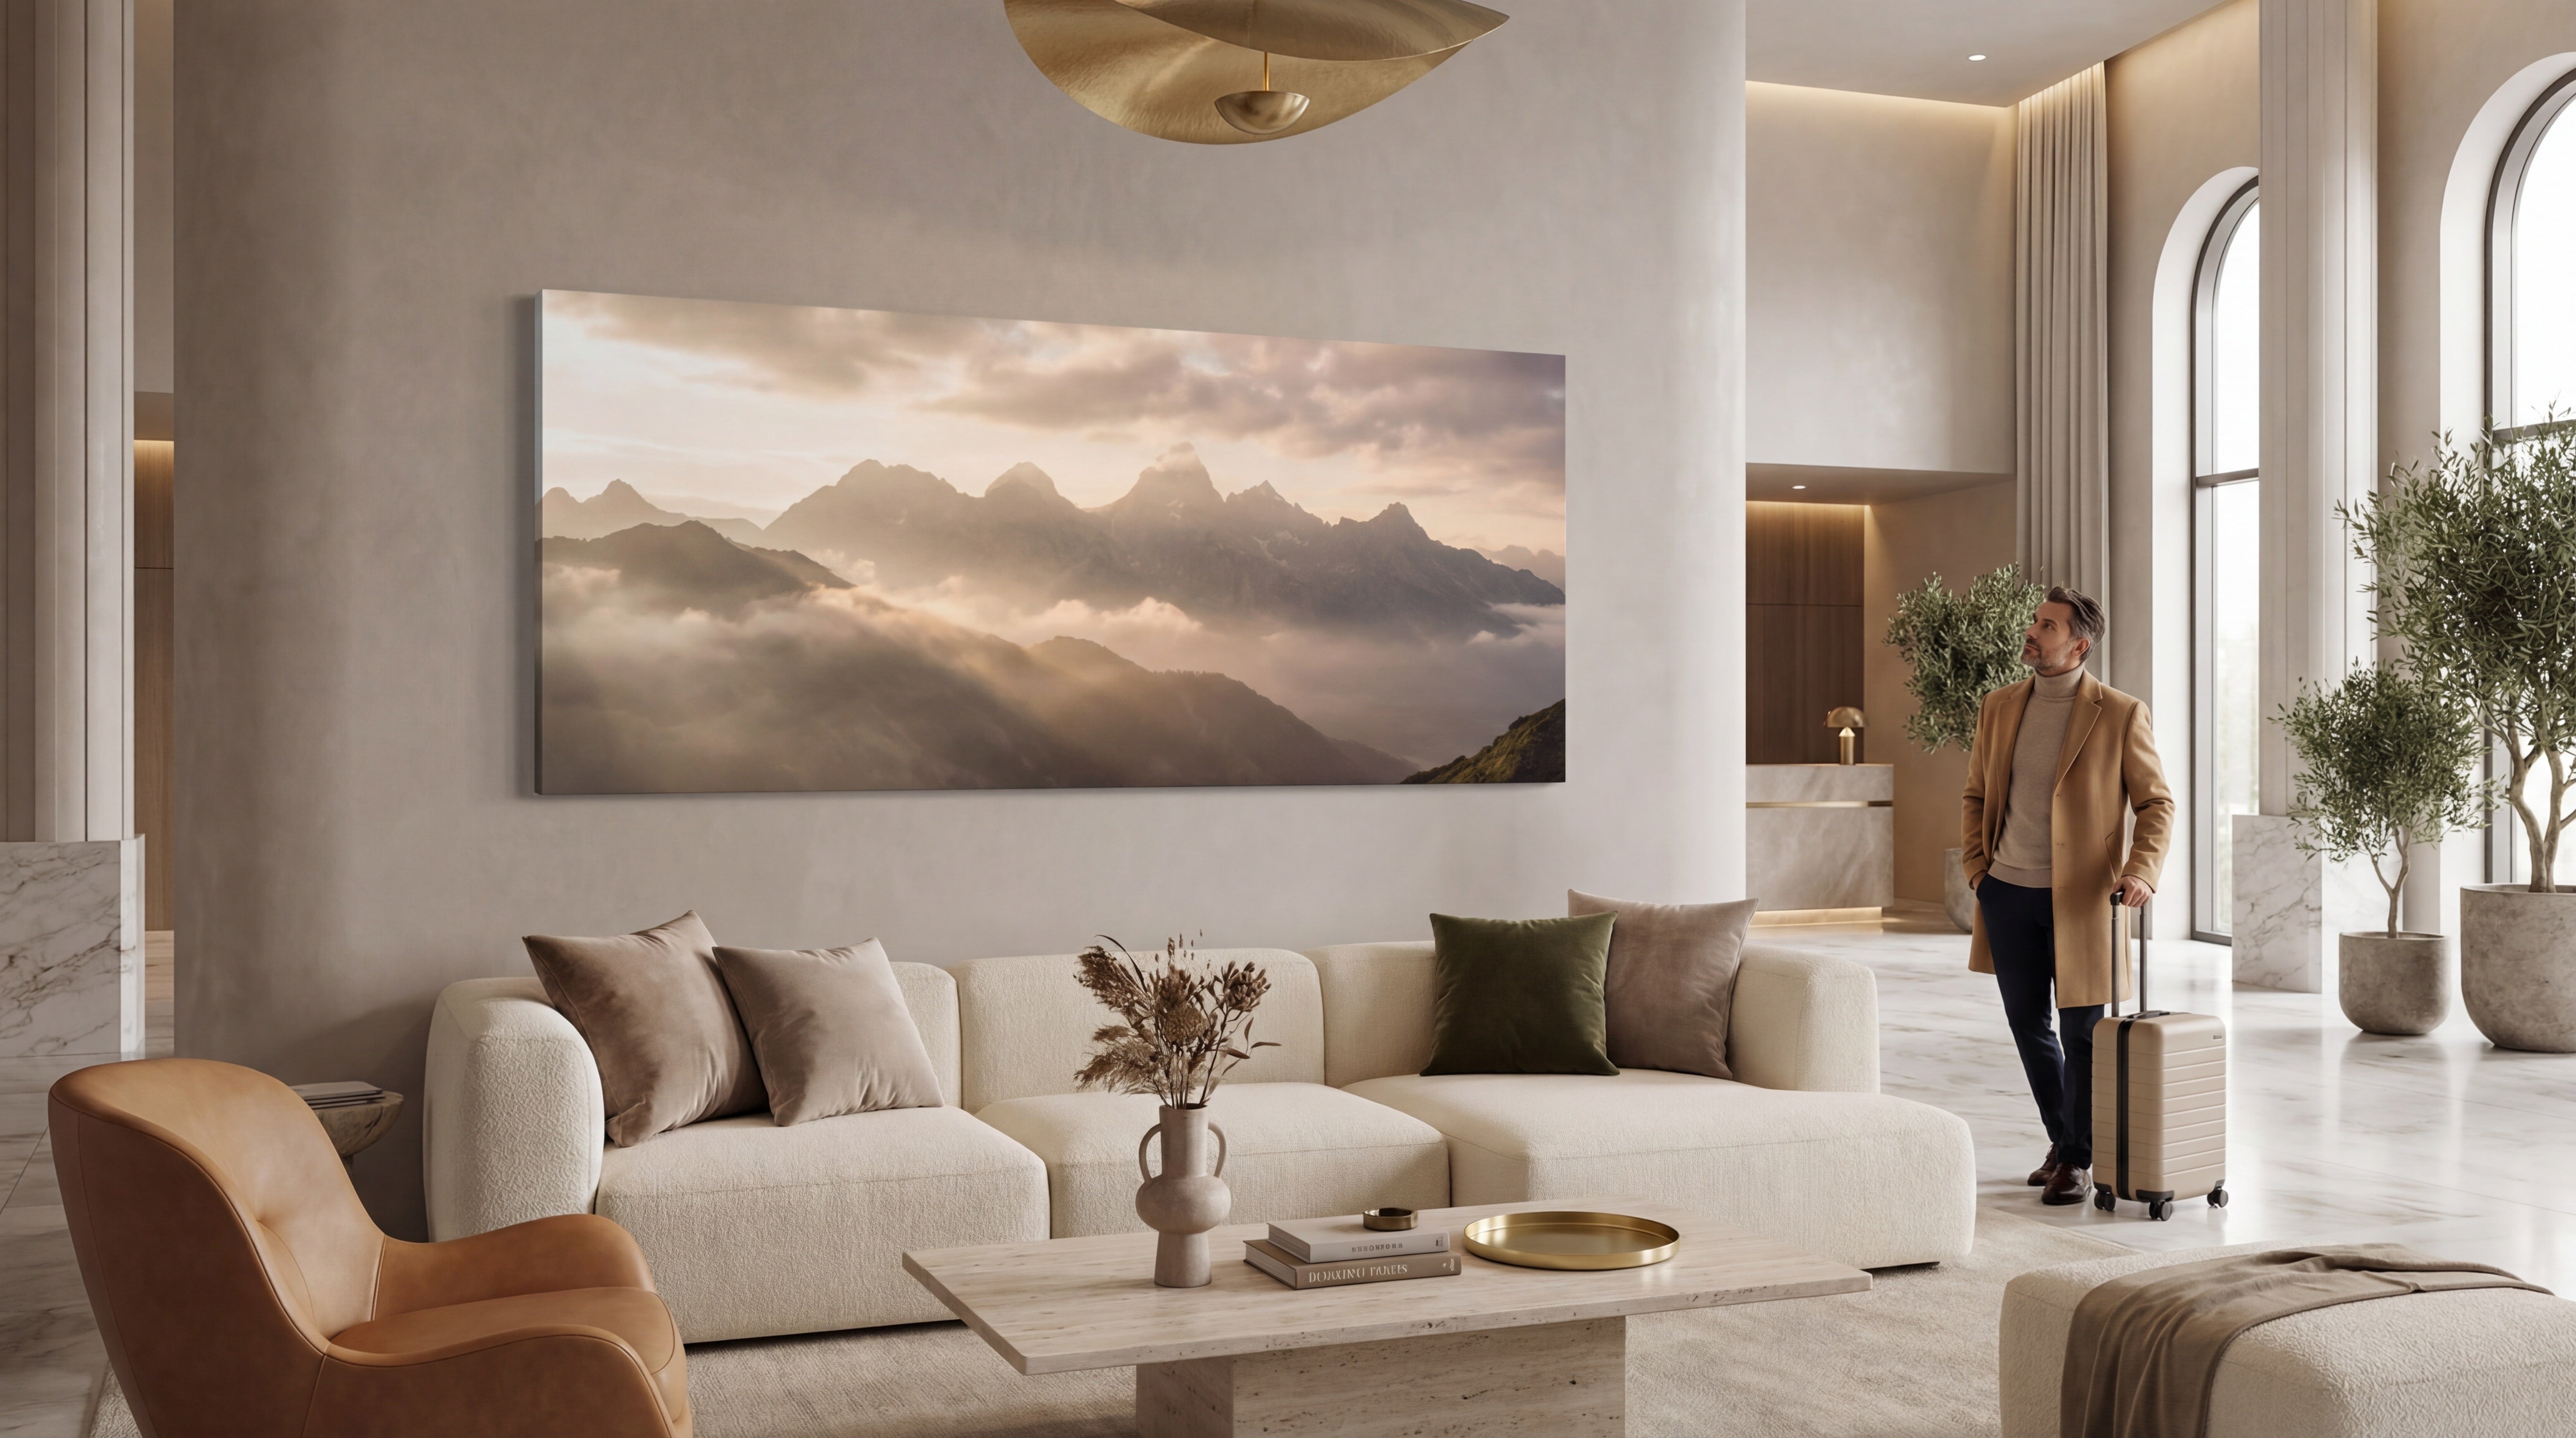
- Panoramic framed photo print – Ideal for ceremony‑wide shots that capture the aisle, guests, and venue in one sweep. Pairing a panoramic print with a slim aluminium frame maximises the sweep without overwhelming the wall.
- Ultra panoramic framed photo print – When the image stretches beyond typical aspect ratios, an ultra‑panoramic frame with acrylic front and back creates a “window‑like” illusion, perfect for modern lofts.
In practice, the 5 must have shots to print wedding photos perfectly often include a venue wide, a first‑look, the ceremony, the couple’s portrait, and a candid reception moment. Selecting the appropriate frame for each ensures the narrative flows smoothly across the room.
Colour considerations: white vs. black
The decision between white framed hangtiles and black framed hangtiles hinges on contrast and lighting. White frames blend into bright walls, allowing the image to dominate without borders drawing attention. Black frames, conversely, define the edge sharply, making colours pop in dimmer spaces. Both options work with acrylic mounts, but the visual impact varies: a white frame on a pastel wall feels airy, while a black frame on a dark feature wall adds depth.
Practical tips for selecting the right combination
- Assess the room’s colour palette before committing to a frame colour; a harmonious scheme reduces visual clutter.
- Measure the wall space and consider the photo’s orientation; a panoramic print may need a longer horizontal stretch, while a portrait‑oriented canvas fits better in vertical niches.
- Check UV protection on glass or acrylic; UV‑blocking coatings preserve colour vibrancy, especially important for wedding photos framed for long‑term display.
- Mind the weight of the finished piece; heavy wood frames often require wall anchors, whereas metal or acrylic mounts can be hung with standard picture hooks.
By understanding the interplay of frame type, material, and print format, couples can transform their treasured wedding images into lasting works of art. The next step—choosing a frame style that complements the wedding theme—will build on these fundamentals, ensuring every piece fits seamlessly into the overall décor narrative.
Choosing the Perfect Frame Style to Complement Your Wedding Theme
When a couple decides how their wedding photos framed will live on their walls, the choice of frame becomes almost as personal as the ceremony itself. A well‑chosen frame not only protects the image but also reinforces the colour palette, era, and mood of the celebration. By looking at the overall theme first - whether it’s rustic, modern, vintage, or beach‑side - couples can narrow the field of options and avoid a mismatch that feels like an afterthought.
One common mistake is to select a frame solely on its aesthetic appeal without checking how it interacts with the image’s tones. For example, a sleek black aluminium frame can look stunning with a minimalist, monochrome wedding album, yet it may overpower a soft pastel‑filled garden ceremony. In practice, designers recommend pairing the frame material to the dominant textures in the venue décor. A reclaimed‑wood frame echoes barn‑style tables, while a brushed‑nickel finish mirrors contemporary metal chairs.
Key considerations for matching frame style to theme
- Colour harmony – Choose a frame colour that either mirrors a prominent hue in the wedding palette or offers a subtle contrast. White framed hangtiles work beautifully with airy, pastel themes, whereas black framed hangtiles lend drama to bold, jewel‑toned celebrations.
- Material resonance – Wood, metal, acrylic, and mixed‑media frames each convey a distinct vibe. Rustic pine aligns with farmhouse weddings; polished chrome complements art‑deco settings.
- Scale and proportion – Large panoramic framed photo prints demand generous borders, while intimate portrait‑oriented shots benefit from narrower trims that keep the focus on the subjects.
- Display format – Consider whether the image will be part of a collage, a single statement piece, or a series of 5 must have shots to print wedding photos perfectly. Consistency across frames creates a cohesive gallery wall.
A practical approach is to start with a mood board. Assemble fabric swatches, invitation samples, and venue photographs, then place a few test frames beside them. This visual experiment helps identify whether a panoramic framed photo print or an ultra panoramic framed photo print will harmonise with the surrounding elements. If the test shows glare or a clash of textures, switch to a mat board or a different frame finish before committing to the final order.
For couples who cherish a timeless aesthetic, wedding canvas prints offer a gallery‑like feel without the glass glare. A canvas stretched over a simple wooden stretcher can emulate classic oil paintings, making it ideal for vintage or romantic themes. When a canvas is paired with a thin, unobtrusive frame—or left frameless—it retains an airy elegance that blends with both traditional and modern interiors.
Conversely, high‑contrast modern weddings often benefit from a sleek, black frame that adds definition. The frame’s thickness can be reduced to keep the emphasis on the photograph’s geometry, especially when the image includes strong lines from architectural backdrops. When applying this style to a series of 5 must have shots to print wedding photos perfectly, a uniform black border ties the collection together while allowing each individual moment to shine.
Tips for finalising the frame selection
- Test lighting – Position the framed image under the lighting conditions expected in the display space. Natural light may soften colours, while artificial light can accentuate metallic finishes.
- Consider future décor changes – A neutral‑toned frame (e.g., matte white or soft grey) offers flexibility if the couple later redecorates.
- Consult a framing specialist – Professionals can suggest archival‑grade materials that protect the photograph from UV damage, an often‑overlooked factor for long‑term preservation.
By aligning the frame’s colour, material, and scale with the wedding theme, couples transform their wedding photos framed into cherished heirlooms that echo the spirit of the day. The next step—preparing the images for printing and sizing—builds on this foundation, ensuring the final presentation is as polished as the celebration itself.
Preparing Your Photos for Framing: Editing, Printing, and Sizing Tips
When the colour palette of the venue and the emotion of the ceremony have already been captured, the next step is to ready those images for display. A well‑edited file can turn a beautiful moment into a timeless piece that looks spectacular behind a white framed hangtiles or a sleek black framed hangtiles. Below are the essential considerations that bridge digital workflow and the physical world of framing.
1. Tidy the image before it ever meets a frame
A clean edit begins with colour balance. Wedding lighting often shifts from soft golden hour to bright reception fluorescents; using a calibrated monitor, adjust white‑balance so skin tones stay natural across the whole day. Contrast should be modest – overly harsh shadows can get lost in matte finishes, while flat images may look dull behind glass.
“A subtle lift in the mid‑tones usually preserves the romance without sacrificing detail,” notes a seasoned photographer.
Sharpening is another key step. Apply a modest amount of output sharpening based on the final print size; larger formats such as a panoramic framed photo print or an ultra panoramic framed photo print need a bit more edge definition to look crisp from a distance.
2. Choose the right file format and resolution
For most prints, a 300 dpi (dots per inch) file at the final size is the gold standard. If the intended piece is a wedding canvas print, the texture of the canvas can mask minor pixelation, allowing a slightly lower resolution without visible loss. Save the master file as a TIFF for lossless quality; a high‑quality JPEG (maximum quality setting) works well for quick proofs or when file size is a concern.
When planning a panoramic framed photo print, crop the image to the exact aspect ratio (often 2:1 or 3:1) before scaling up. This prevents awkward blank borders and ensures the panoramic view fills the frame edge‑to‑edge.
3. Size it right – the 5 must have shots to print wedding photos perfectly
Most couples have a handful of images they know must be displayed: the first kiss, the bouquet toss, the parents’ reactions, the candid laughter, and a wide‑angle view of the venue. These “5 must have shots” often become the anchor pieces of a gallery wall.
To keep them proportionate, measure the wall space and decide on a uniform height—commonly 18‑24 inches for portrait orientation. Maintaining a consistent height creates visual harmony, especially when mixing white framed hangtiles with black framed hangtiles.
If the venue calls for a large statement piece, let one of the five images become a ultra panoramic framed photo print spanning 48 inches or more. Pair it with smaller supporting prints to avoid a visual overload.
4. Print medium matters
- Matte paper reduces glare and is ideal for bright rooms where natural light hits the glass directly.
- Glossy paper enhances colour vibrancy, perfect for indoor galleries with controlled lighting.
- Canvas adds texture and depth, lending a painterly feel that matches rustic or vintage wedding themes.
Selecting the medium early informs the colour profile (Adobe RGB vs. sRGB) and the type of ink (pigment vs. dye‑based). Pigment inks, used for most wedding canvas prints, resist fading and are safer for long‑term display.
5. Proof and preview
Before committing to a large order, request a small‑scale proof or a soft‑proof on your calibrated screen. This step catches unexpected colour shifts caused by different paper stocks. For panoramic or ultra‑panoramic pieces, ask the printer to supply a wall‑mounted mockup; visualising a 60‑inch panoramic framed photo print on your living‑room wall helps decide whether additional trimming is required.
6. Final preparation for framing
Once the print is approved, trim any excess bleed, leaving a clean edge for the frame’s matting or direct mounting. If using white framed hangtiles, a thin white mat can soften the transition between image and frame. Conversely, a black framed hangtiles often benefits from a no‑mat approach, allowing the image to extend to the edge for a modern look.
Remember to label each file with its final dimensions and print medium, then store the digital version in a cloud backup. This practice ensures that future reprints—whether for a new home or a grand‑parent’s anniversary—maintain the same quality as the original.
By treating editing, printing, and sizing as an integrated workflow, couples can transform treasured memories into artworks that shine behind any frame, from classic white to bold black. The next section will walk through the hands‑on process of assembling those prints into a polished, ready‑to‑hang display.
Step‑by‑Step Guide to Framing Your Wedding Photos for Maximum Impact
When the editing phase is complete, the next critical task is turning those digital memories into wedding photos framed works of art. A systematic approach ensures the final display looks polished, cohesive, and aligned with the couple’s style. Below is a practical workflow that blends professional studio routines with home‑owner sensibilities.
1. Choose the Right Print Medium
The foundation of any framed piece is the print itself. For most couples, wedding canvas prints provide a gallery‑quality texture that mimics fine art, while classic paper prints are ideal for sleek, modern frames.
- Canvas – adds depth and a tactile feel; works well with white framed hangtiles for a light, airy ambience.
- Fine‑art paper – offers crisp detail; pairs nicely with black framed hangtiles for a dramatic contrast.
2. Confirm Dimensions and Aspect Ratios
Accurate sizing prevents costly re‑cuts. Measure the intended wall space, then select a print size that respects the original aspect ratio. If the photograph is a landscape shot, consider an ultra panoramic framed photo print (e.g., 24×48 in) to fill a longer wall without distortion. For more conventional portraits, a standard 16×20 in or 20×30 in works well.
3. Prepare the Frame Selection Checklist
A well‑chosen frame not only protects the image but also reinforces the wedding theme.
- Style – ornate gold for vintage, minimal black for contemporary.
- Material – wood for warmth, metal for industrial chic.
- Colour – match the palette of the venue décor; white frames lighten a room, while black frames anchor a bold colour scheme.
4. Assemble the Materials
Gather everything before starting to avoid interruptions:
- Chosen frame (white or black as decided)
- Mat board (optional, typically 2‑4 in wide)
- Acid‑free backing board
- UV‑protective glazing (glass or acrylic)
- Hanging hardware (D‑rings, sawtooth, or picture wire)
- Clean, lint‑free cloth and mild cleaner
5. Layout and Mock‑up
Place the printed photo on a clean surface and position the mat board underneath. Before securing anything, step back and visualise the final look. If the couple has identified their 5 must have shots to print wedding photos perfectly, arrange those images in a mock‑up to test balance and flow.
“A quick dry‑run on the floor saves time and prevents mismatched frames later,” notes a veteran studio technician.
6. Secure the Image
Using acid‑free tape or photo corners, attach the print to the backing board. Ensure the edges are flush to avoid gaps. If a mat is used, centre the image within the opening, leaving an even border on all sides.
7. Install Glazing
Lay the UV‑protective glass or acrylic on top of the backing board. This layer guards against fading and fingerprints. For a sleek silhouette, consider a frameless approach, where the glass edges serve as the visual boundary.
8. Final Assembly
Insert the assembled sandwich—print, backing, and glazing—into the frame's rabbet (the recessed ledge). Press gently to seat it evenly. Secure the frame’s backing with the supplied clips or brackets, making sure there is no movement.
9. Attach Hanging Hardware
Select hardware that matches the frame’s weight. Heavy‑duty D‑rings are ideal for larger canvas prints, while lighter pictures can use picture wire. Measure the centre of the frame, mark the hangers, and install them precisely to maintain level alignment when mounted.
10. Hang and Level
Position the framed piece on its intended wall. Use a level to verify that the top edge is perfectly horizontal. If multiple images are to be displayed together—perhaps an arrangement of the 5 must have shots—measure consistent spacing (typically 2‑4 in) between each frame.
11. Evaluate Lighting and Protection
After hanging, assess how natural or artificial light interacts with the glazing. If glare is an issue, angle the frame slightly or add a UV‑filter film. For rooms with abundant sunlight, a matte finish on the glass can reduce reflections while preserving colour fidelity.
12. Final Touches
Step back and admire the composition. Adjust any slight misalignments, clean any fingerprints, and ensure the hanging hardware remains secure. The result should be a striking showcase of wedding photos framed that captures both the intimacy of the day and the aesthetic vision of the couple.
With this step‑by‑step process, the transition from digital file to gallery‑ready display becomes seamless, paving the way for the next stage: thoughtfully arranging and lighting the framed pieces throughout the home.
Displaying and Hanging Framed Wedding Photos: Layouts, Lighting, and Placement

When the wedding photos framed are finally ready, the way they are displayed can be as meaningful as the images themselves. A thoughtful layout turns a collection of memories into a cohesive visual story, while proper lighting ensures every detail shines. Below are the most effective strategies for arranging, illuminating, and positioning your framed treasures.
Choose a layout that reflects the ceremony’s flow Consider the sequence in which the day unfolded—pre‑ceremony preparations, the vows, the first dance, and the send‑off. Arranging frames in chronological order, either horizontally along a hallway or vertically on a feature wall, guides visitors through the narrative without the need for captions. For larger spaces, a mixed‑grid layout works well: place a panoramic framed photo print of the ceremony centre‑piece, then flank it with smaller portraits or wedding canvas prints that capture intimate moments.
Mix formats for visual balance A single‑size grid can feel static. Introducing variation—such as an ultra panoramic framed photo print alongside a few white framed hangtiles—adds depth. The sleek lines of black framed hangtiles are especially striking against light‑coloured walls, creating a modern contrast that highlights the colour palette of the wedding décor.
Spacing and alignment A common mistake is crowding the frames. Aim for a uniform gap of 2–3 inches between pieces; this breathing room prevents the display from looking cluttered and makes each image stand out. When using a gallery rail system, the rail’s depth can be adjusted to accommodate thicker frames, ensuring the glass sits flush with the wall and avoids unwanted shadows.
Lighting that enhances, not overwhelms Natural light can be beautiful but also fickle. Position the display away from direct sunlight to protect the prints from fading. Instead, install LED picture lights—warm‑toned bulbs around 3000 K work well for wedding photos framed because they mimic the soft ambience of most reception venues. For a gallery‑like effect, place a recessed spotlight 12–18 inches above the centre of each frame; this reduces glare and accentuates texture, particularly effective for wedding canvas prints that boast subtle brush strokes.
Layered illumination for depth Consider a two‑tier lighting scheme: a primary overhead fixture for overall brightness, complemented by a secondary strip of soft backlighting behind the wall. The backlight creates a gentle halo that makes the frames appear to float, a technique often employed in upscale gallery installations. When paired with black framed hangtiles, the effect adds a contemporary edge while keeping the focus on the photographs themselves.
Height matters The centre of the display should sit at eye level for average viewers—approximately 57–60 inches from the floor. If the wall is particularly tall, break the arrangement into multiple rows, each anchored at the same height to maintain visual continuity. For rooms with low ceilings, a single‑row horizontal layout reduces the need for vertical space and keeps the scene intimate.
Strategic placement in the home High‑traffic areas like entryways benefit from a bold, single statement piece—perhaps an ultra panoramic framed photo print of the couple’s first kiss. In more relaxed rooms, such as a living room, a curated cluster of wedding photos framed can become a conversation starter. Position the collection near a comfortable seating area but ensure there is at least a 30‑inch clearance from furniture to avoid accidental bumps.
Secure hanging methods Use picture‑hanging hardware that matches the frame’s weight. For frames under 5 kg, a simple adhesive strip may suffice, but heavier pieces—particularly those backed with glass—require a wall anchor and screw. You can also consider a French cleat system; it distributes weight evenly and allows the frame to be removed without disturbing the wall.
“A well‑lit, thoughtfully spaced display turns wedding memories into an enduring gallery that feels both personal and polished.”
Final touches Once the frames are hung, step back and examine the overall balance. If one side feels heavier, swap a smaller portrait with a larger canvas print. Adjust lighting angles until each image is illuminated evenly, and check that no glare spoils the view. With these considerations, the collection of wedding photos framed will not only preserve the day’s magic but also enrich the everyday spaces where they live.
Advanced Presentation Techniques: Multi‑Photo Collages and Shadow Boxes
Advanced PresentationTechniques: Multi‑Photo Collages and Shadow Boxes
When the gallery of wedding photos framed in the living room already tells a beautiful story, adding a multi‑photo collage or a shadow box can turn a simple display into a curated masterpiece. These techniques let couples showcase the 5 must have shots to print wedding photos perfectly while varying scale, texture, and depth.
Why a collage works – A collage unifies several moments—first looks, vows, candid laughter—into a single visual rhythm. By arranging images of different sizes within a common frame, the eye is guided across the narrative without overwhelming the space. In practice, designers often pair a large centrepiece, such as an ultra‑panoramic framed photo print of the ceremony aisle, with smaller supporting images. This hierarchy creates a focal point that anchors the surrounding memories.
Choosing the right format –
- Grid collages: Ideal for a clean, contemporary look. A 3‑by‑3 grid of 12 × 12 cm prints works well inside a white framed hangtiles or black framed hangtiles border, providing uniform spacing.
- Free‑form layouts: Perfect for storytelling. Overlap a wedding canvas print of the first dance with a candid shot, letting the edges peek out. This approach adds movement and keeps the viewer’s attention shifting.
- Mixed‑size arrangements: Combine a panoramic framed photo print of the venue’s exterior with a series of 15 × 20 cm portraits. The larger image anchors the piece while the smaller ones add detail.
Transitioning from the previous section’s layout tips, it’s useful to remember that lighting should highlight each picture’s texture. Soft, indirect illumination reduces glare on glossy wedding canvas prints while accentuating the matte finish of a white framed hangtiles display.
Building a Shadow Box
A shadow box adds three‑dimensional depth, turning flat images into a tactile experience. Start with a sturdy frame—often a deep‑profile wooden box painted black for contrast. Inside, layer:
- Background material – Choose a subtle fabric or textured paper that complements the wedding colour palette.
- Core photographs – Place a panoramic or ultra‑panoramic framed photo print as the backdrop. Its wide aspect creates a cinematic feel that fills the box.
- Accents – Add dried petals, a slice of the wedding invitation, or a tiny copper key used to lock the ceremony venue door. These items give context without cluttering the visual space.
Because shadow boxes are deeper than standard frames, they allow for the inclusion of wedding photos framed in varying media. A glossy wedding canvas print can sit alongside a matte‑finished photo, each catching light differently.
Practical steps for a polished result
- Plan the layout on paper before committing to the box. Sketching helps prevent overcrowding and ensures a balanced distribution of colour and shape.
- Secure images with archival‑grade adhesive to avoid yellowing over time.
- Use levelled spacers to keep each element evenly raised, preserving the shadow effect.
- Finish the front with a clear acrylic sheet. This protects the contents while maintaining visibility, and it can be swapped later if new photos become available.
Tips for Integration with Existing Displays
A collage or shadow box should complement, not compete with, the surrounding frames. Position the new piece near a cluster of white framed hangtiles to create a visual bridge, or use a black framed hangtiles arrangement to emphasise contrast. If the room already features a panoramic framed photo print of the ceremony, consider a shadow box that incorporates the same image as its base—this reinforces continuity across the collection.
Finally, rotate the featured images seasonally. Swapping a winter wedding photo for a summer ceremony keeps the display fresh and encourages revisiting the 5 must have shots to print wedding photos perfectly. This dynamic approach ensures the wall remains an evolving tribute rather than a static gallery.
Maintaining and Refreshing Framed Wedding Photos for Long‑Term Beauty
A well‑chosen frame can protect wedding photos framed for generations, but even the toughest glass and sturdy matting need regular care. Dust, humidity, and sunlight are the three chief culprits that can dull colour and weaken backing. By adopting a handful of simple routines, couples can keep their cherished images looking fresh for decades.
Clean the surface without risk – The first step is to remove surface dust with a soft, lint‑free microfiber cloth. Avoid paper towels or abrasive cleaners, which can scratch acrylic or glass. For stubborn fingerprints, mist the cloth lightly with distilled water or a dedicated frame‑cleaning spray; never spray directly onto the glass. This method works equally well for white framed hangtiles and black framed hangtiles, whose glossy surfaces reveal smudges more readily than traditional frames.
Control the environment – Relative humidity between 30 % and 50 % is ideal for most photographic media. In damp basements or overly dry attics, use a dehumidifier or humidifier accordingly. UV‑filtering window film can cut harmful rays by up to 99 %, preserving the richness of wedding canvas prints and pan‑or ultra‑panoramic framed photo prints alike. If the display room lacks climate control, consider rotating the artwork every few years to a different wall, spreading exposure evenly.
Check the mounting – Over time, the adhesive that holds a print to its backing can weaken, especially in humid climates. Gently lift the edge of the mat to confirm the print isn’t curling. If you notice a slight lift, re‑adhere it with museum‑quality, acid‑free mounting tape. This low‑impact fix prevents the paper from separating and protects the edge of a panoramic framed photo print from tearing.
Refresh the matting and backing – Even the highest‑quality mat board can yellow or become brittle after twenty years. Re‑matting offers an opportunity to update the visual contrast, perhaps swapping a plain white mat for a subtle cream that complements the wedding décor. When re‑framing, use archival‑grade, acid‑free backing boards to guard against acid migration that could discolour the image.
Rotate and re‑print strategic shots – Couples who selected the “5 must have shots to print wedding photos perfectly” often find that a favourite portrait fades faster because it receives more attention. By periodically swapping that image with another from the same set, the most‑viewed piece gets a brief respite from light exposure. This practice also keeps the display fresh and encourages revisiting other cherished moments.
Protect against accidental damage – While the frame itself shields against everyday bumps, accidental spills can seep through gaps. Applying a thin bead of silicone caulk to the frame corners creates a moisture barrier without altering the aesthetic. For frameless options, a clear, removable acrylic shield can be added to the front, offering an extra layer of defence that can be taken off for cleaning.
Expert tip: When cleaning a black framed hangtiles piece, use a dark cloth rather than a bright one. Light colours can leave faint marks on the matte surface, especially under low‑light conditions.
Seasonal maintenance checklist
- Spring: Dust frames, inspect mounting, and replace any cracked glazing.
- Summer: Verify UV‑filtering measures and monitor humidity levels.
- Autumn: Rotate images to balance light exposure across the collection.
- Winter: Check for condensation on glass and re‑seal corners if needed.
By integrating these practices into an annual routine, couples safeguard the visual story of their wedding day. The result is not merely a protected photograph, but a living tribute that continues to inspire, whether displayed as a timeless white framed hangtiles accent or as a striking ultra‑panoramic framed photo print that captures the full sweep of the celebration.
Frequently Asked Questions
- What frame materials work best for wedding photos and why? Frames come in a range of materials – wood, metal, acrylic or mixed media – each giving a different feel. Choose a material that mirrors your wedding palette and the room’s décor for a harmonious look.
- How can I match a frame style to my wedding theme? Select a style that echoes your wedding theme – vintage for a rustic ceremony, sleek minimal for modern nuptials, or ornate for a classic affair – to reinforce the mood when displayed.
- What preparation steps should I take to ready my wedding photos for framing? Before framing, edit for colour balance, crop to the desired aspect ratio, and print on high‑quality paper or canvas at a resolution of at least 300 dpi to ensure crisp, lasting images.
- What are the best practices for displaying and hanging framed wedding photos? Hang frames at eye level, use adequate lighting (soft, indirect light or picture lights), and consider a cohesive layout – grid, salon style or staggered – to create visual flow in the room.
