Understanding Large Canvas Photo Prints: Basics, Benefits and How It Transforms Your Space
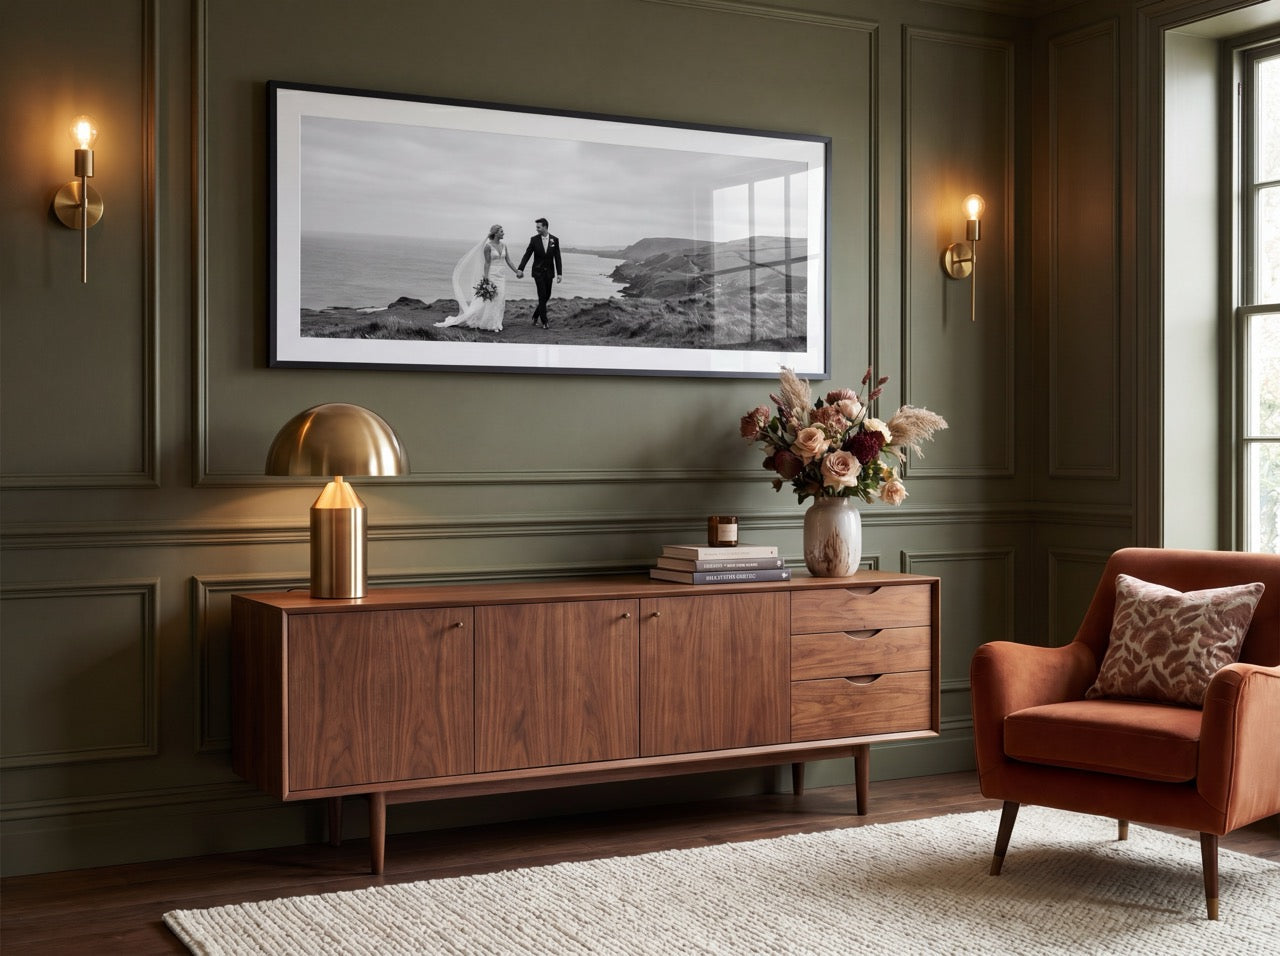
When a home or office wall is covered with a large canvas photo, the effect is immediate. The image becomes more than decoration; it becomes a focal point that defines the room’s mood. In the first hundred words, the distinction between canvas prints vs photo prints is introduced, setting the tone for a deeper look at why a panoramic canvas print can reshape an environment.
At its core, a print large canvas photo is created by stretching high‑resolution image canvas over a wooden stretcher frame. The canvas surface is pre‑treated with a coating that helps the ink adhere evenly, reducing glare and protecting colours from fading. This construction differs from a traditional framed print, where a thin photo paper is placed behind glass and matted. Because the canvas itself forms the artwork, there is no need for a bulky frame, allowing the visual weight of the picture to dominate the wall.
Benefits that matter
- Depth without bulk – The texture of the canvas mimics a painted surface, adding subtle three‑dimensional interest while keeping the installation light.
- Seamless edge-to‑edge display – A stretched canvas hides edges, creating a continuous image that feels larger than its actual dimensions.
- Versatility for any style – From ultra‑panoramic canvas prints that span an entire living‑room wall to modestly sized pieces for a hallway, the format adapts to both modern and classic interiors.
- Ease of mounting – Most large canvases arrive with pre‑installed hanging hardware, making it simple for non‑professionals to hang a piece of office wall art without drilling extensive mounting brackets.
A common question is whether a panoramic framed photo print might achieve the same impact. While a framed version can protect a paper print, the glass barrier often interferes with colour vibrancy and interrupts the illusion of an uninterrupted scene. In practice, an ultra‑panoramic canvas print tends to preserve the original image’s depth and colour richness, especially when the artwork features expansive landscapes or cityscapes.
How it transforms a room
Consider a conference room with neutral furniture. Adding a 3‑meter‑wide ultra‑panoramic canvas of a sunrise over mountains instantly injects warmth and conversation starter. The visual line draws eyes upward, making the ceiling appear higher, while the colour palette subtly influences the ambience. For a home office, a bold abstract canvas can energise the space, promoting creativity and focus. These effects are reflected in the frequently cited “10 reasons very large canvas wall art transforms your room,” such as increased perceived space, enhanced lighting dynamics, and an emotional connection to the décor.
Practical considerations
- Resolution matters – The source image should be at least 150 dpi at the final print size; otherwise, pixelation can become noticeable. Professional printers often recommend uploading a file that matches the canvas dimensions in inches.
- Material choice – Cotton canvases is a more premium choice and provides a softer feel and gallery look, while polyester offers resistance to humidity - good for office environments.
- Colour management – Calibrated monitors and colour profiles ensure that the printed canvas matches the designer’s vision. Many print services include a proof step for this reason.
Master the art of printing large canvas photos by following expert tips and techniques: verify image resolution, choose the appropriate canvas material, and preview the final layout before ordering. A well‑chosen image paired with the right size can become a statement piece that elevates any space.
Transitioning to the next phase, selecting the perfect image and size becomes crucial. The upcoming section will explore key factors for choosing photographs that maximise visual impact, ensuring that every large‑scale canvas piece aligns with the room’s proportions and design goals.
Choosing the Perfect Image and Size: Key Factors for Stunning Wall Art
Selecting the right photograph and scaling it correctly is the foundation of any successful large‑format décor project. While the allure of an ultra panoramic canvas print can be immediate, the decision‑making process should balance visual impact, room dimensions, and the practicalities of printing technology. Below are the essential considerations that help both novices and seasoned designers master the art of printing large canvas photos.
1. Define the visual purpose Start by asking what mood the piece should evoke. A vibrant cityscape works well as a focal point in a modern office wall art setting, whereas a muted landscape can soften a conference room’s ambience. Clarifying the intended emotional response narrows the field of viable images and guides later size decisions.
2. Assess the wall’s proportions Measure the height and width of the intended display area, then calculate the maximum canvas width that leaves at least 10 % breathing space on each side. For example, a wall that is 3 m wide can comfortably accommodate a 2.5 m‑wide canvas, preserving a balanced look without overwhelming the surrounding fixtures. When the wall is particularly tall, a vertical orientation may be more appropriate than a panoramic layout.
3. Choose image resolution wisely Large‑scale prints demand high‑resolution files. As a rule of thumb, aim for at least 150 ppi (pixels per inch) at the final print size; anything below can result in noticeable softness or pixelation. If the source image is 4000 × 2500 px, it will render crisply at roughly 1.0 m × 0.6 m, but will need up‑sampling to reach an ultra panoramic canvas print size of 2 m × 0.5 m. Upscaling tools, when used judiciously, can preserve detail without creating artefacts.
4. Consider composition and cropping A panoramic canvas print often benefits from a wider field of view, but cropping must preserve the image’s core narrative. In practice, keep the rule of thirds in mind: place key elements along the intersecting lines to maintain visual interest across the length of the piece. For a panoramic framed photo print, a slight crop may be necessary to fit the frame’s border without losing the central subject.
5. Match image style to the room’s décor Colour palette, texture, and subject matter should complement existing furniture and wall colour. A monochrome beach scene can add serenity to a white‑walled office, while a bold, colourful abstract works best against darker, neutral tones. When the room already features strong patterns, a simple, clean image avoids visual clutter.
6. Test with a mock‑up Before committing to production, generate a digital mock‑up that places the chosen picture in the room’s photo. Many print services provide an interactive preview tool that allows you to visualise how a very large canvas wall art transforms your room. This step also reveals any unintended clashes with lighting or furniture layout.
7. Evaluate the viewing distance The larger the artwork, the farther away viewers will typically stand. An ultra‑panoramic framed photo print intended for a hallway may be viewed from a distance of three metres, allowing for slightly lower resolution without sacrificing perceived quality. Conversely, a piece positioned at eye level in a lounge should be rendered at the highest fidelity possible.
8. Factor in budget and material constraints While canvas offers a soft, gallery‑like feel, framed prints can deliver a more polished appearance with added protection. The cost difference between a standard panoramic canvas print and an extra large canvas print can be significant, especially when custom framing or special coatings are involved. Align the chosen size with the overall budget to avoid compromising on quality.
9. Leverage the customer gallery for inspiration Many vendors showcase a customer gallery that displays real‑world installations. Browsing these examples provides insight into how different image selections and dimensions interact with various interior styles. Observing how other offices or homes integrate large‑scale art helps refine one’s own vision.
10. Plan for future flexibility Finally, think about whether the artwork might be rotated or replaced later. Selecting a versatile image - such as a neutral landscape or abstract texture - allows for easy swapping without clashing with future décor updates. This foresight maximises the longevity of the investment.
Transitioning from image selection to material choice, the next step will explore how different canvas types, frames, and protective coatings influence the final look and durability of the piece. By addressing each of these factors thoughtfully, readers can confidently choose an image and size that elevate their space and set the stage for a stunning visual statement.
Selecting Materials and Finishes: From Canvas Types to Protective Coatings
When the discussion moves from image choice to the physical product, the material palette becomes the decisive factor that separates a striking panorama from a modest wall piece. In the realm of canvas prints vs photo prints, the substrate, weave, and coating each influence durability, colour fidelity, and the overall feel of the artwork. Understanding these variables helps anyone who wants to master the art of printing large canvas photos expert tips and techniques make an informed decision for both home and office wall art.
Choosing the right finish
The finish determines how light interacts with the surface and how vulnerable the piece is to scratches or dust. Three primary finishes dominate the market:
- Matte – A non‑reflective surface that reduces glare, perfect for rooms with abundant natural light. Matte finishes also conceal fingerprints, making them a practical option for busy office spaces.
- Satin – Offering a modest sheen, satin balances vibrancy with resistance to glare. It works well for a customer gallery where colours need to pop without overwhelming the viewer.
- Gloss – The highest gloss level amplifies depth and saturation, giving the image a photographic look. However, gloss can highlight surface imperfections, so a protective coating is often recommended for large‑scale installations.
A protective acrylic or polyurethane coating can be applied over any finish. In practice, a thin, UV‑blocking acrylic layer extends the life of a panoramic canvas print by up to several years, while a polyurethane sealant adds a hardwearing shield against accidental scuffs.
Mounting considerations
Stretched canvas on a wooden frame provides a classic look, but the frame material influences the final presentation. Pine frames are budget‑friendly and suit casual home décor, whereas aluminium frames lend a modern aesthetic that aligns with contemporary office wall art. For ultra‑panoramic canvas print installations, a continuous aluminium rail system helps distribute weight evenly and prevents warping over long spans.
When a framed option is preferred, the decision between a panoramic framed photo print and an unframed canvas hinges on the desired visual weight. A frame adds a defined edge that can anchor a piece within an eclectic gallery wall, whereas a frameless canvas creates a seamless, immersive experience - ideal for the “10 reasons very large canvas wall art transforms your room” scenario.
Practical tips for material selection
- Match the environment – Dry, low‑humidity spaces favour cotton‑blend canvas, while humid areas benefit from vinyl‑coated variants.
- Consider viewing distance – If the artwork will be viewed from several metres away (as with an ultra‑panoramic canvas print), a tighter weave and higher‑grade ink substrate ensure image sharpness remains apparent.
- Test the finish – Request a small sample swatch. Observing how the matte, satin, or gloss finish behaves under the room’s lighting helps avoid unwanted glare.
By weighing fabric type, finish, and protective coating together, designers can select a material suite that not only complements the chosen image but also safeguards the investment. The next step in the process - preparing and uploading the photo for large‑scale printing - will build on these material choices to ensure colour accuracy and optimal file resolution.
Step‑by‑Step Guide to Preparing and Uploading Your Photo for Large‑Scale Printing
When the decision to transform a wall with a panoramic canvas print or a panoramic framed photo print is made, the next critical phase is getting the image ready for production. Even the most striking visual can lose impact if the file is poorly prepared, so this guide walks through each stage with practical, expert‑level advice.
1. Choose the right file type A high‑resolution JPEG (minimum 300 dpi) works for most online services, but a TIFF offers lossless quality and is preferred for ultra‑panoramic canvas print projects where colour fidelity is paramount. Convert the image to sRGB colour space; most printers calibrate to this profile, ensuring that the colours you see on screen translate accurately to the final product.
2. Verify dimensions and aspect ratio Large‑scale prints often require unconventional dimensions. For a 30 × 90 inch ultra panoramic canvas, the image should be 9000 × 2700 pixels at 300 dpi. Use a simple calculator or the printer’s size guide to confirm the pixel count. If the original photo is narrower, consider cropping strategically rather than stretching, which can introduce artefacts.
3. Assess image quality Zoom into the file at 100 % to spot any noise, banding, or lens distortion. Basic editing tools can smooth grain without blurring detail—apply a subtle noise‑reduction filter only if the file shows visible speckles. Sharpening should be applied after resizing; a modest amount (around 10‑15 % of the default setting) restores edge definition that can soften during up‑scaling.
4. Manage colour balance White‑balance issues become obvious on large surfaces. Use levels or curves adjustments to bring whites to true neutral and ensure skin tones remain natural. If the image contains both bright highlights and deep shadows, employing a gentle HDR‑style tone‑mapping can preserve detail across the dynamic range without creating an over‑processed look.
5. Embed a margin or bleed Most services require a 2–3 % bleed to avoid white edges after trimming. Add a transparent border or extend the background colour slightly beyond the final dimensions. This margin is especially important for framed prints, where the frame can mask minor misalignments.
6. Compress wisely If the file size exceeds the upload limit, compress it using a high‑quality setting. Avoid aggressive JPEG compression; a quality level of 85–90 % retains sufficient detail for a very large canvas wall art piece while keeping the upload manageable.
7. Name the file descriptively A clear filename such as “seaside‑sunset‑ultra‑panoramic‑canvas‑300dpi.tif”—helps the print provider match the image to the order and reduces the risk of mix‑ups in the customer gallery.
8. Upload and double‑check Log into the printing portal, select the desired product (canvas prints vs photo prints), and follow the on‑screen prompts. Most sites display a preview with a grid overlay; review this carefully for cropping errors. Many providers also offer a proof service; requesting a digital proof before committing to a fully printed piece can catch mistakes that are otherwise costly to correct.
9. Secure the file after upload After confirming the preview, save the order confirmation and a copy of the final uploaded file in a dedicated folder. This archive serves as a reference if the printer needs to re‑render the piece or if a customer requests a repeat order for office wall art.
10. Prepare for the next step With the image safely uploaded, the project moves to mounting and hanging techniques. The forthcoming section will explore how to attach the canvas or frame securely, ensuring the visual impact of the panoramic canvas print or ultra panoramic framed photo print is preserved for years to come.
By following these ten steps, anyone from a novice decorator to a seasoned interior designer can master the art of printing large canvas photos, using expert tips and techniques that guarantee a flawless, gallery‑ready result.
Mounting and Hanging Techniques: Ensuring a Secure and Professional Display
A well‑mounted large canvas or framed print can transform a room, but the impact quickly fades if the piece is not secured properly. After uploading the artwork, the next critical step is choosing a mounting method that matches the weight, wall material, and aesthetic goals. This guide walks the reader through proven techniques, from simple picture‑rail hooks to specialised canvas‑stretch brackets, helping anyone from home decorators to office wall art curators avoid the common pitfalls that can damage both the artwork and the wall.
Why mounting matters Large canvas prints vs photo prints behave differently when it comes to load distribution. A stretched canvas relies on a wooden frame that bears the tension of the fibres, while a framed photo typically hangs from a backing board and a glass front. In practice, a 100 cm × 150 cm ultra‑panoramic canvas can weigh as much as 12 kg, whereas a similarly sized panoramic framed photo print may be lighter but requires a sturdier hanging system to support the glass and matting. Choosing the wrong hardware can lead to sagging, cracking, or even a dangerous fall.
Assess the wall surface
- Stud detection – For drywall or plaster, locate the wooden studs. Mounting directly into a stud offers the strongest anchor for very large pieces.
- Masonry considerations – Brick or concrete walls need masonry anchors and a drill with a carbide bit.
- Painted wood or paneling – Use toggle bolts or Molly anchors designed for hollow walls.
If the wall cannot accommodate heavy hardware, consider a rail‑system that distributes the load across a broader area.
Choose the appropriate hanging hardware
- D‑rings and sawtooth brackets – Ideal for modestly sized canvas prints (up to 70 cm × 100 cm). They attach to the back frame and hang from a single hook.
- French cleats – Consist of two interlocking wood or metal strips; one mounts to the wall, the other to the artwork. This system is excellent for ultra‑panoramic canvas prints because the weight is shared across two points.
- Z‑hang brackets – Small metal plates that slide into pre‑drilled slots in the canvas frame. They keep the artwork flush against the wall and reduce wobble.
- Wire hanging – A robust steel wire stretched between two D‑rings can support larger frames, provided the wire is rated for at least twice the artwork’s weight.
When dealing with a panoramic framed photo print, a picture‑rail hook combined with a cleat offers a low‑profile look while preserving the frame’s integrity. For office wall art that may be adjusted frequently, magnetic hanging strips provide a non‑permanent solution without compromising the surface.
Installation steps (problem → solution → implementation)
- Measure and mark – Determine the centre point of the artwork, then mark the desired height on the wall. A common rule of thumb is to place the centre at eye level (about 145 cm from the floor).
- Drill pilot holes – Using the appropriate drill bit for the wall type, create pilot holes at the marked points. This prevents cracking and ensures the anchor sits flush.
- Insert anchors – Tap masonry anchors or toggle bolts into the holes until they are snug. For studs, a simple wood screw will suffice.
- Attach hardware – Secure the chosen bracket or cleat to the back of the canvas or frame. Tighten all fasteners evenly to avoid warping.
- Hang and level – Lift the artwork onto the wall anchor or interlock the cleat. Use a bubble level to confirm perfect alignment; small adjustments can be made by shifting the cleat or loosening a screw slightly.
Expert tip: When mounting an ultra‑panoramic canvas, place two cleats - one near the top and another near the bottom to prevent the centre from sagging under its own weight.
Finishing touches
- Protect the wall – Apply felt pads or rubber washers to the bottom corners of the frame to protect paint or plaster.
- Conceal hardware – Small decorative caps can hide screw heads, maintaining a clean visual line.
- Safety check – After installation, gently tug the artwork to confirm it is stable. For public spaces or high‑traffic offices, re‑inspect the mounting every six months.
By following these techniques, the reader can confidently display a panoramic canvas print or a panoramic framed photo print that looks professional and stays secure. The next section will explore how fine‑tuning colours and resolution can further elevate the visual impact of large‑scale prints.
Optimising Colours and Resolution: Advanced Tips for Photo‑Perfect Results
When the canvas is finally ready to hang, the visual impact hinges on two technical pillars: colour fidelity and image resolution. Even the most striking panoramic canvas print can look flat if the hues shift during printing, while a vivid framed photo may reveal pixelation when viewed up close. Mastering these details helps the piece compete with the bold statement of an ultra‑panoramic canvas print and ensures that a panoramic framed photo print retains its depth on any wall.
Colour management begins with a calibrated workflow. Professional printers recommend working in a colour‑managed environment from the moment the file is opened. Using a calibrated monitor (ideally with a hardware device that verifies brightness, contrast and gamma) guarantees that the on‑screen palette mirrors the final output. Once the monitor is trusted, the photographer should embed an ICC profile - preferably the one supplied by the print service - into the file before any adjustments. This profile acts as a translation table, converting the screen’s RGB data to the printer’s space without losing nuance.
A common pitfall is relying on default sRGB settings for large‑scale work. While sRGB works for web images, an ultra panoramic canvas print often benefits from a broader colour space such as Adobe RGB or ProPhoto RGB, which preserves subtle greens and deep blues that might otherwise be clipped. After converting, a gentle soft‑proof can reveal how the colours will appear on the chosen canvas texture. If the preview shows a shift toward magenta or loss of contrast, a modest tweak in the curves or selective colour balance usually restores equilibrium.
Resolution is equally critical, especially when the image spans several feet. The rule of thumb for wall art is a minimum of 150 ppi (pixels per inch) at the final size; however, for ultra‑high‑detail displays - think a 3‑meter panoramic canvas - 150 ppi can still look crisp when viewed from a typical room distance. To calculate the required pixel dimensions, multiply the intended print width by the desired ppi. For example, a 3 m (118 in) wide canvas at 150 ppi demands 17 700 pixels across. If the source image falls short, up‑sampling with a high‑quality algorithm such as bicubic‑smooth can add pixels without introducing harsh artifacts, though it should be used sparingly.
Practical steps for resolution optimisation
- Check the original file size before any cropping; retain the largest possible dimensions.
- Avoid excessive compression (e.g., low‑quality JPEG) that introduces banding; TIFF or maximum‑quality JPEG is safer.
- Resize using professional software (Adobe Photoshop, Affinity Photo) rather than online tools that may strip metadata.
- Apply sharpening after resizing; an unsharp mask set to a low radius (0.5‑1 px) restores edge definition lost during scaling.
- Consider the viewing distance; larger prints viewed from farther away can tolerate slightly lower ppi without noticeable softness.
When preparing a panoramic framed photo print, the framing glass can also affect colour perception. UV‑protective, anti‑glare glass helps preserve the printed hues and reduces colour shift caused by ambient light. For canvas, the texture itself introduces a subtle matte finish that can mute overly saturated colours, so a slight increase in vibrancy during editing often yields a more natural look once printed.
Finally, a quick visual test can catch issues before the order is placed. Printing a 10 cm × 10 cm proof on matte photo paper allows the creator to inspect colour balance, contrast and fine detail. If the proof matches expectations, scaling up to a massive office wall art piece is far less risky.
By integrating calibrated colour management, selecting an appropriate colour space, and ensuring sufficient resolution, photographers can confidently deliver canvas prints vs photo prints that command attention—whether they choose an ultra panoramic canvas print for a dramatic backdrop or a panoramic framed photo print for a refined gallery wall. The next section will explore the most frequent mistakes that can undermine these efforts and how to correct them.
Common Mistakes to Avoid When Creating Large Canvas Prints and How to Fix Them
When a designer or homeowner moves from colour‑optimising to the actual production of a large canvas piece, the margin for error widens. Even small oversights can turn a striking panoramic canvas print into a disappointing focal point. Below are the most frequent pitfalls, paired with practical fixes that keep the final artwork crisp and ready for display.
1. Ignoring the image’s native resolution A frequent error is uploading a file that looks fine on a laptop screen but lacks the pixel density needed for an ultra panoramic canvas print. The result is soft edges and visible artefacts when the image is enlarged. Fix: Verify the file’s DPI (dots per inch) before uploading. For canvas sizes over 1 m wide, aim for at least 150 dpi at the final dimensions. If the original file is lower, up‑sample it in a reputable editor, then apply a sharpening filter to restore fine detail.
2. Choosing the wrong aspect ratio Many customers select photos that fit a standard 4:3 or 3:2 ratio, then force them into a panoramic framed photo print layout. This leads to unwanted cropping or blank margins that break the visual flow. Fix: Start with the intended canvas aspect ratio - commonly 3:1 for panoramas or 4:1 for ultra panoramas. Crop the source image to match this ratio before any colour correction. This ensures the composition remains balanced and the subject stays central.
3. Over‑reliance on automatic colour correction Automatic profiles in editing software can boost vibrancy, but they may also shift hues dramatically. When the canvas is printed, colours that appeared natural on a monitor can look oversaturated or muted under gallery lighting. Fix: Perform a manual colour balance after the automatic step. Compare the image on a calibrated monitor to a printed test strip. Adjust highlights, shadows and saturation until the printed sample mirrors the preview.
4. Neglecting bleed and safety margins Large‑format printers often trim a few centimetres from each edge. Failing to leave a bleed zone can cut off important visual elements, especially in a panoramic canvas print where the scene stretches across the whole surface. Fix: Add a minimum 3‑cm bleed around the entire image file. Keep critical details at least 5 cm inside the outer edge to create a safety buffer. Most printing services provide templates that show these guidelines.
5. Using low‑quality source files for text or graphics Embedding logos, signage or typographic elements that are raster‑based at 72 dpi will cause pixelation on a large canvas. This mistake is common when the same file is reused from a website thumbnail. Fix: Replace raster text with vector versions or recreate the graphics at a higher resolution. Export the final design as a TIFF or PSD with embedded colour profiles to preserve sharpness.
6. Forgetting about fabric texture and stretch Canvas material has a subtle weave that can accentuate fine lines or create an unwanted moiré effect. Ignoring this texture may lead to a print that looks flat or uneven once stretched. Fix: Preview the design on a high‑resolution photograph of the canvas surface. If the image contains repeating patterns, consider adding a slight grain or reducing the line weight to blend with the fabric texture.
7. Mismanaging file compression Saving the master file as a compressed JPEG can introduce artefacts, especially in areas of smooth sky or skin tones. These artefacts become glaring after the image is enlarged. Fix: Keep the working file in a lossless format (TIFF or PSD). Only compress for web previews, never for the final upload. If the printer requires a JPEG, request the highest quality setting (typically 12 or 100%).
8. Overlooking colour‑profile mismatches Most monitors operate in sRGB, while many professional printers use Adobe RGB or a proprietary CMYK profile. Submitting an sRGB file without conversion can cause colour shifts, undermining the intended mood of the piece. Fix: Convert the image to the printer’s recommended profile before export. Ask the provider for their exact specifications and use a colour‑managed workflow to maintain consistency.
9. Skipping the proof stage Even after meticulous preparation, the final print can surprise. Some companies ship the first print without a proof, leaving the buyer with a costly mistake. Fix: Request a soft proof (digital mock‑up) and, if possible, a hard proof on a small‑scale canvas. Review the proof for colour accuracy, edge alignment and overall impact before approving the full run.
10. Poor file naming and organisation When multiple canvas sizes are ordered, confusing file names can lead to the wrong image being printed on the wrong canvas. This is especially problematic for office wall art projects that involve several pieces. Fix: Adopt a clear naming convention that includes the project name, canvas size and version number (e.g., “ClientX_3x1_UltraPanorama_v2.tif”). Store files in a dedicated folder to avoid mix‑ups.
Addressing these common mistakes early saves both time and money, and it ensures the final canvas piece truly transforms the room. By checking resolution, respecting aspect ratios, managing colour profiles and using proofs, creators can master the art of printing large canvas photos with confidence.
The next step after a flawless print is to protect it. In the following section, practical advice on maintaining and refreshing your canvas art will keep the piece looking fresh for years to come.
Maintaining and Refreshing Your Canvas Art: Long‑Term Care for Home Décor
Maintaining and Refreshing Your Canvas Art: Long‑Term Care for Home Décor
When a panoramic canvas print becomes the focal point of a living room or an office wall art installation, the desire to keep it looking fresh can be as strong as the original excitement of choosing the piece. Proper care not only preserves colour vibrancy but also protects the material from the everyday wear that can dull even the most striking ultra‑panoramic canvas print. Below are practical strategies that blend routine upkeep with occasional rejuvenation, helping the artwork stay gallery‑ready for years.
Everyday dust management A gentle approach is key. Soft, lint‑free cloths or microfiber dusters capture surface particles without scratching the cotton‑woven canvas. For larger pieces, a low‑velocity handheld blower can remove dust from the edges and stretcher bars before it settles. Avoid household cleaning sprays; the chemicals in many aerosols can weaken the protective coating applied during printing. Instead, if a smudge appears, dampen the cloth with plain water, wring it thoroughly, and pat the area lightly before drying with a clean, dry cloth.
Shielding from sunlight and heat Direct UV exposure is the primary cause of fading in canvas prints versus photo prints. Position the artwork away from windows that receive intense afternoon sun, or install UV‑filtering film on the glass. When repositioning is not possible, consider a picture rail or subtle framing with a thin acrylic panel to act as a barrier. Maintaining a stable indoor temperature, ideally between 18 °C and 22 °C prevents the canvas fibres from expanding and contracting, a process that can cause tension cracks over time.
Humidity control Canvas is hygroscopic; it absorbs moisture from the air. In humid climates, placing a small dehumidifier nearby or using silica gel packets tucked discreetly behind the mounting hardware can prevent mould growth. Conversely, overly dry environments may cause the canvas to become brittle. Aim for a relative humidity level of 45‑55 % to keep the fibres supple without encouraging fungal activity.
Cleaning and spot‑treatment For stubborn stains, the safest route is a professional cleaning service that specialises in large‑scale textile artwork. If a DIY approach is preferred, test any cleaning solution on an inconspicuous corner first. A mixture of one part mild dish soap to ten parts distilled water, applied with a soft sponge, can lift surface grime without saturating the canvas. Never saturate the material; excess liquid can seep into the backing and compromise the adhesive that holds the print to the stretcher bars.
Re‑tensioning and frame checks Over time, the wooden stretcher bars may loosen, especially on ultra panoramic framed photo prints that span wide walls. Periodically inspect the corners for any audible creaking or visible gaps. Tightening the screws with a small Phillips‑head screwdriver restores tension and prevents sagging. If the canvas appears to be pulling away from the frame, a professional re‑stretching service can reinstate a taut surface without damaging the printed image.
Rotating artwork for visual refresh Even the most beloved piece benefits from a seasonal change of scenery. Swapping a panoramic canvas print with a complementary piece from the customer gallery can rejuvenate the room’s aesthetic while giving the original artwork a rest from constant exposure. This practice also spreads the visual impact across multiple spaces, reinforcing the idea that “10 reasons very large canvas wall art transforms your room” are not limited to a single wall.
Protective coatings and UV glass Modern printing processes often apply a clear, UV‑resistant varnish to the canvas surface. While this layer adds durability, it may wear over several years. Re‑applying a fresh coating, either through a specialised service or a DIY kit designed for canvas, can restore the initial sheen and add another shield against fading. For spaces where the artwork is displayed without a frame, a thin sheet of UV‑blocking acrylic placed a few centimetres in front of the canvas offers an additional defensive barrier without detracting from the image’s depth.
By integrating these maintenance habits into regular household routines, owners of panoramic framed photo prints or ultra panoramic canvas prints can enjoy sustained brilliance. The effort required is modest—dusting, occasional humidity checks, and mindful placement—yet the payoff is a vibrant, enduring showcase that continues to enhance any interior, be it a cosy home lounge or a sophisticated office wall art environment.
Frequently Asked Questions
- What exactly is a large canvas photo and why is it suitable for home or office décor? A large canvas photo is printed on high‑quality cotton or polyester canvas and stretched over a frame, offering a durable, vibrant piece of art that can instantly enlarge a room’s visual impact.
- How do I pick the right image and size for a large‑format canvas print? Choose an image with high resolution, consider the wall’s aspect ratio, and select a size that balances visual presence with the space available to avoid overwhelming the room.
- What material and finish options should I consider for longevity and visual quality? Opt for premium canvas material, decide between matte or glossy finishes, and apply a UV‑protective coating to safeguard colours against fading and moisture.
- What steps are needed to ready my photo for large‑scale printing? Prepare a file at least 300 dpi, use the correct colour profile (usually sRGB or Adobe RGB), and upload via the supplier’s guide to ensure accurate colour reproduction and sharpness.
- What is the best way to mount and hang my large canvas safely? Use sturdy picture‑hanging hardware, level the mount, and ensure the frame or canvas is securely anchored to prevent sagging or accidental falls.